You can raise three different animals in Rogue Legends:chickens, sheep, and cows. Each animal needs certain equipment and care, and will in return give you produce which you can sell. If you give your animals extra care, they will eventually give you upgraded produce which is more valuable and/or more useful. The levels of produce at present are small, medium, large and gold.
Animals that give gold produce are currently the most lucrative source of income in the game, but reaching this level requires at least a year and a half of full daily care.
Basics[]
Start-up Costs & Cost-Effectiveness[]
In the early game, you will usually be cash-strapped. As a result, it's important to consider the initial investment costs of each animal and how quickly they can turn a profit. Chickens currently have the smallest start-up cost by a significant margin and will turn a profit soonest, but bear in mind that chickens have the lowest maximum profit per day so will not make you the most profit in the long-term. The following table provides a brief overview of the potential costs and benefits of each animal, though bear in mind the prices used are 100% market price and it is therefore possible to acquire everything more cheaply.
| Animal | Required Equipment | Total Start-up Cost | Approx. Time to Make Profit | Maximum Profit per Day | Produce Usefulness |
|---|---|---|---|---|---|
| Chicken ($800) |
Chicken Feeder ($700) Chicken Feed ($10 per day) |
$1500 | ~40 days | $90-$95 | Eggs can be eaten; regular source of food in winter |
| Cow ($4000) |
Trough ($1000) Brush ($800) Milk Pump ($2000) Hay Seeds ($495) |
$8295 for first cow $5495 for later cows |
~60 days for first cow ~<50 days for later cows |
$300 | Milk can be drunk; regular source of liquid in winter |
| Sheep ($3000) |
Trough ($1000) Brush ($800) Shears ($1800) Hay Seeds ($495) |
$7095 for first sheep $4495 for later sheep |
~70 days for your sheep ~<60 days for later sheep |
$200 |
6 Medium Wool/4 Gold Wool makes Essence of Fluff No other use |
Hay Requirements (Sheepcownomics)[]
Sheep and Cattle each eat 1 hay per day. 1 square of hayfield produces 1 hay every 3 days. So during Spring, Summer and Autumn, you need 3 Hayfields, giving an average production of 1 hay per day to keep 1 animal fed. But in Winter, you can neither grow not harvest hay so you need to increase production by 1/3 so that your produce in the 3 productive months make up for the 1 unproductive month, meaning you need 4 hay per 3 days, so 4 hayfields. But since you have to leave your last Autumn crop to prevent losing it all in Winter and then starting over in Spring, you need a little more. If we allow for a medium margin of error for timing, missed harvests, misclicks with the sickle, etc, that comes to 4.5 hayfields per animal.
So you need 9 hayfields per 2 animals to sustain them.
Animal Care & Upgrading Produce[]
While the animal shop owner will list a number of actions necessary to care for your animal, the only essential requirement is that each of your animals is fed. If your animals are not fed, they will be disgruntled the following day and will not give you any produce. Repeatedly failing to feed your animals will cause them to starve to death.
The purpose of the other care actions - picking up chickens, brushing and talking to cows and sheep - is to upgrade their produce. Each animal appears to have a hidden statistic (henceforth called "affection") which can only be raised by picking up, brushing and talking to your animals. Feeding and harvesting produce do not raise affection, though neglecting to feed your animals will cause a drop in affection, which may result in a downgrading of their produce.
Because these extra care actions only affect affection, you can stop brushing/talking to/picking up your animals without fear of harming them or their affection stat. However, it is advised to give your animals full care as often as possible so that their produce will upgrade quickly. After your animals give gold produce, there is no further benefit to brushing/talking to/picking up your animals - although you may decide to continue raising their affection for a time so that if you do neglect to feed them, their produce will not immediately be downgraded.
The time to upgrade varies depending on the amount of optional care you give your animals, their species and what tier of produce they are already on. There may be other factors but these have not been confirmed. The table below details the results of a single experiment to test, among other things, how quickly it is possible for animals to reach gold level.
| Animal | Small to Medium | Medium to Large | Large to Gold | Total Minimum Time from Small to Gold |
|---|---|---|---|---|
| Chicken | 37 days | 44 days | 60 days | ~141 days |
| Cow | ~36 days | ~44 days | 40 days | 120 days |
| Sheep* | 33 days | 48 days | 42 days | ~123 days |
| Notes: | * As sheep can only be sheared every 3 days, it's impossible to know whether they have reached gold level on the 2 intervening days. As a result, their results may technically be off by some days; it seems likely they are actually on par with cows for upgrade times. | |||
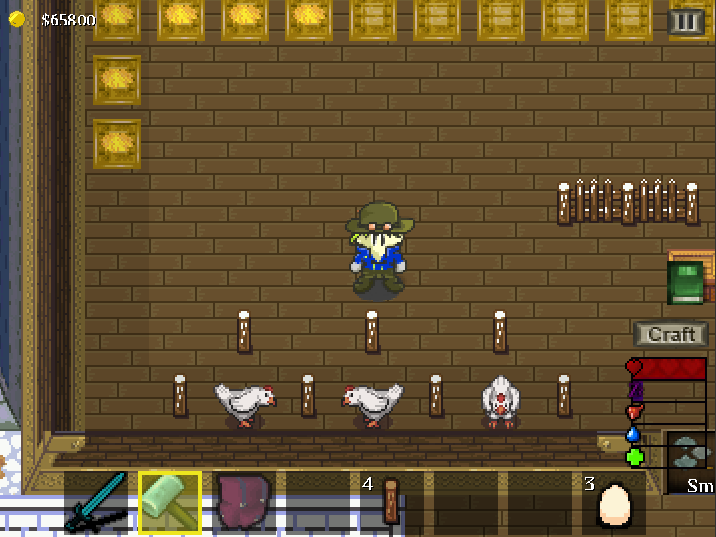
Animals[]
Chickens[]
Base Price: $800
Required Daily Needs: 1 Chicken Feed
Optional Daily Needs: picking up
| Picture | Produce Name | Collection Method | Production Frequency | Sell Price | Uses |
|---|---|---|---|---|---|
 |
Small Egg | Pick up manually | Daily | $50 | Edible |
 |
Medium Egg | $60 |
Edible | ||
 |
Large Egg | $80 | Edible | ||
  |
Gold Egg | $100 | Edible |
Sheep[]
Base Price: $3000
Required Daily Needs: 1 hay
Optional Daily Needs: brushing, talking to
| Picture | Produce Name | Collection Method | Production Frequency | Sell Price | Uses |
|---|---|---|---|---|---|
  |
Small Wool | Shears | Every 3 days | $100 | none |
  |
Medium Wool | $400 | Essence of Fluff (6 Medium Wool) | ||
  |
Large Wool | $500 | Essence of Fluff (5 Large Wool) | ||
  |
Gold Wool | $600 | Essence of Fluff (4 Golden Wool) |
Cows[]
Base Price: $4000
Required Daily Needs: 1 hay
Optional Daily Needs: brushing, talking to
| Picture | Produce Name | Collection Method | Production Frequency | Sell Price | Uses |
|---|---|---|---|---|---|
  |
Small Milk | Milk Pump | Daily | $100 | Drinkable |
  |
Medium Milk | $150 | Drinkable | ||
  |
Large Milk | $200 | Drinkable | ||
  |
Gold Milk | $300 | Drinkable |
Animal Care Items[]
Tools[]
| Picture | Item Name | Base Price | Use | Instructions |
|---|---|---|---|---|
  |
Brush | $800 | Brushing cows and sheep | Use on cows and sheep daily |
  |
Milk Pump | $2000 | Collecting milk from cows | Use on cows daily |
  |
Shears | $1800 | Collecting wool from sheep | Use on sheep every 3 days |
Feeders[]
| Picture | Item Name | Base Price | Use | Instructions |
|---|---|---|---|---|
 |
Chicken Feeder | $700 | Feeding chickens | Place under a roof and fill with chicken feed daily |
  |
Trough | $1000 | Feeding cows and sheep | Place 1 per animal under a roof and fill with hay daily |
Animal Food[]
| Picture | Item Name | Base Price | Use | Instructions |
|---|---|---|---|---|
 |
Chicken Feed | $80 for 8 | Feeding chickens | Put in chicken feeder |
  |
Hay Seeds | $495 for 9 seeds | Feeding cows and sheep |
Plant on hoed tiles. Harvest hay with a sickle after 3 days. The hay will regrow repeatedly through spring, summer and fall. If hay is not fully grown, it will die on Winter 1 and you will have to replant it in Spring. Leave your hay fully grown at the end of Fall and it will survive all winter. |
Barns[]


You should build a barn and/or henhouse in order to keep your animals from wandering. The larger your collection of animals, the larger your barn will need to be, as when it is overcrowded it is difficult to move between your animals.
Efficient Barn Design[]
As a space-saving tactic, you can use fences to separate your cows and sheep into 'stalls' (see first example image). Simply coax them into a corner by pushing them in the right direction and then place the fences or walls around them. You can care for your animals from outside the stall. Animals in stalls will still be able to eat from troughs or feeders you have placed elsewhere, even though they cannot physically access them.

For chickens, you cannot use square stalls because you will not be able to access the eggs they have laid. It is also a little difficult to place chickens back into square stalls. However, if you leave at least one corner of the stall empty (see second picture), you will be able to walk into that corner and pick up any eggs within the stall, and easily pick up and drop your chicken back inside.
Animals in stalls sometimes glitch through the fences or walls when you interact with them. This seems to be more common with fence stalls than wall stalls. If possible, leave a 2 block wide corridor between stalls and have corridors behind stalls to simplify pushing your animals back into their stalls should they glitch out of them.
Buying Extra Troughs and Chicken Feeders[]
If you purchase extra troughs and feeders, you can fill them up and any uneaten food will carry over to the next day, so you will not have to fill the troughs and feeders every day. This may be useful if you want to save time or hassle, or if you want to go exploring and do not intend to return for several days. As long as you have left enough feeders/troughs to give each of your animals 1 feed/hay per day that you're gone, they will still be happy when you get home.
Pregnancy[]
Pregnancy potions can be bought from the animal shop for a base price of $1000. Using one of these potions on a cow or sheep will cause them to become pregnant. The animal will remain pregnant for 10 days, during which it cannot be milked or sheared, nor can a ribbon be used to sell or value it. After these 10 days, a calf or lamb will be born.
For roughly one month (19-20 days) the animal will remain an infant. As with pregnant animals, the milk pump, shears and ribbon do not have any effect on an infant animal, but you can continue to brush and talk to it. At the end of the 20 day period, the animal will grow up and will thereafter function as a normal adult animal.
The advantage of using a pregnancy potion instead of buying a new cow or sheep from the shop is that the infant begins with a higher value than a newly shop-bought animal. This means that they will produce better products in a shorter time, saving you days of extra care and ultimately earning you more money sooner. However, as shown below, the offspring value depends on the mother's value, so a pregnancy potion may not always be more beneficial than buying an animal from the shop if your intended mother animal is low in value. Use the ribbon to find out which of your animals has the highest value before you consider giving any a pregnancy potion.
Experiment Results[]
| Mother's value on day of conception | Mother's value on birth day | Offspring value on growing up day | Real additional value* | Days of care saved over a shop-bought animal** | |
|---|---|---|---|---|---|
| Cow 1 | $4295 (+2295) | $4335 | $2530 (+530) | $330 | 33 days |
| Cow 2 | $4895 (+2895) | $5005 | $2625 (+625) | $425 | 42.5 days |
| Sheep 1 | $3504 (+2004) | $3584 | $1956 (+456) | $296 | 37 days |
| Sheep 2 | $4032 (+2532) | $4112 | $2032 (+532) | $372 | 46.5 days |
| NOTES: |
| ||||
These results show that using pregnancy potions on high value animals instead of buying animals from the shop will save you a great deal of animal care and possibly make you more money. There appears to be a positive correlation between mother value and offspring value, therefore the time saved and the profit made will depend on the value of the animal you give the pregnancy potion to. For this reason it is advisable to give pregnancy potions only to your highest value animal(s), preferably those who are already at gold level. In lower value animals, the cost of the potion, the 10 days' loss of productivity from the mother animal and the 20 days of caring for an animal who gives no produce, may ultimately prove more expensive and scarcely more time efficient than buying an animal from the shop instead.
Feeding Service[]
The Feeding Service is a scroll purchased from the animal shop. The base price is $10000. If you purchase the Feeding Service, the shopkeeper will feed your animals until the next time you return to your farm, allowing you to go away on a journey for multiple days at a time without upsetting or harming your animals. You will not receive any animal products produced in your absence and the shopkeeper will not give your animals any additional care.
As this item is one-use, you must buy the Feeding Service every time you go on an adventure. Additionally, the fluctuating price of the Service may scupper your plans to go on an adventure on a certain day. As a result of these disadvantages, you may consider that it is cheaper and more convenient in the long run to expand your barn and invest in extra troughs and feeders when they are heavily discounted in the shop. As detailed above in the Barn section, if you put out food for all the days you will be gone in these feeders/troughs, your animals will be well-fed while you are away. An additional benefit to leaving food yourself is that your chickens will continue to produce eggs every day, whereas they will not do so using the Feeding Service.
Research Information[]
Thanks to the information of the people before and after a period of research, hope the following information helps everyone. There are only given the necessary information to avoid wordiness.
Some definitions and laws[]
We may change the effectiveness of the animal by actions like holding, talking, brushing, feeding. These actions will affect a hidden indexes (integer), so-called "Care Index" (CI).
ATTENTION:
- CI can be negative, 0 or positive
- For new purchase, the initial CI is 0
- For lamb/calf, the initial CI will be different (look at the Pregnancy)
If the animal is not eating, it will affect other hidden index (integer), so-called "Upset Index" (UI).
ATTENTION:
- UI can be 0 to 11
- For new purchase, the initial UI is 0
- For lamb/calf, the initial UI will be different (look at the Pregnancy)
- When UI = 0, all actions are used to increase the CI
- When UI > 0, all actions are used to reduce the UI
- If UI = 11, the animal will DIE
The bigger the better CI. The smaller the better UI.
The following table shows the affect:
| When UI = 0
Do |
When UI = 0
Don't |
When UI > 0
Do |
When UI > 0
Don't | |
|---|---|---|---|---|
| Holding | +1 CI | 0 | -1 UI | 0 |
| Talking | +1 CI | 0 | -1 UI | 0 |
| Brushing | +1 CI | 0 | -1 UI | 0 |
| Feeding | 0 | -1 CI & +1 UI (*) | 0 | -1 CI & +1 UI (*) |
(*) +3 UI for pregnant animal and lamb/calf
SOME OTHER LAWS
- When UI > 0 in the day, the cow does not produce milk, the chicken does not produce egg and the number of waiting days to getting wool unchanged
- When pregnant animal are eaten, the number of waiting days to calving still down even if UI > 0
- When lamb/calf are eaten, the number of waiting days to become adult still down even if UI > 0
IDENTIFICATION SIGN:
- When holding/talking/brushing, if the heart symbol appear mean +1 CI, if the three dot symbol appear mean -1 UI
- Using Pregnant Potion and the heart symbol appear DOES NOT mean the same. Milking and the three dot symbol appear DOES NOT mean the same
Table below shows the lowest CI to get product/action:
| Name | Sell & Pregnant | Medium product | Large product | Gold product |
|---|---|---|---|---|
| Chicken | None | 36 | 81 | 141 |
| Sheep | 11 | 61 | 161 | 241 |
| Cow | 11 | 61 | 161 | 241 |
** If the CI is negative, the product is still SMALL
Pregnancy[]
Initial CI of lamb/calf is calculated as follows: RoundDown(CI / 7). Which:
- RoundDown(X) is the largest integer that is less than or equal to X. RoundDown(3.2) = 3; RoundDown(3.8) = 3
- CI is a Care Index of adult animals when calving
Example: before the switch time, CI of adult animal is 100. At switch time (5:00), lamb/calf was born; the initial CI is 14, the initial UI is 0 and after 19 days will become adult animal.
ATTENTION: (also with such Example) if at that time did not have enough food for the lamb/calf, the initial CI is 13 (14 - 1), the initial UI is 3 and after 20 days will become adult animal.
HOW TO KNOW WHAT ANIMAL WILL BE EATEN: animal was dropped (being born is like being dropped) before it was eaten before. Example: we drop the animal in the following order: cow(1st), sheep(2nd), cow(3rd), calf(4th) from cow(1st), sheep(5th). If only 3 hays, cow(1st), sheep(2nd) and cow(3rd) will be eaten. The same applies to chicken. This requires us to remember the order when dropped animals.
EXTRAS: The calculation of sell price for sheep is 1500 + CI * 4 and for cow is 2000 + CI * 5
For simplicity, we do complete all the work (holding/talking/brushing/feeding), each day will have the following results: chicken +1 CI, sheep +2 CI, cow +2 CI, pregnant animal waiting 10 days, lamb/calf waiting 19 days and has an initial CI of RoundDown(CI / 7).